In the previous post we have seen how to create a container image with an Azure Self Hosted Agent based on a Windows container. Then we have run this container on a local Docker installation. This is not very useful because usually we need the agent continuously running somewhere. In Azure, we have multiple ways to host a container: Azure Kubernetes Service, Azure Container Instance or Web App for Containers. In this article I will talk about how to run the DevOps Agent on the last one.
Build a Docker Image on Azure Container Registry
The minimal resource set that we need are: a Container Registry, an Azure App Service Plan supporting containers and a Web App for Containers instance.
We can consider Azure Container Registry as a managed container service that can be used to build and index our images. To build our Azure DevOps Agent container image the steps are the following:
- Install Azure CLI (https://docs.microsoft.com/en-us/cli/azure/install-azure-cli)
- Clone the repository
|
|
- Login to Azure
|
|
- Create a Resource Group and an Azure Container Registry instance
|
|
- Build the image
|
|
The last command creates a package starting from the current folder, uploads it to Azure Container Registry and executes the Dockerfile to build the image. The resulting image is tagged as windows-build-agent:v1.0
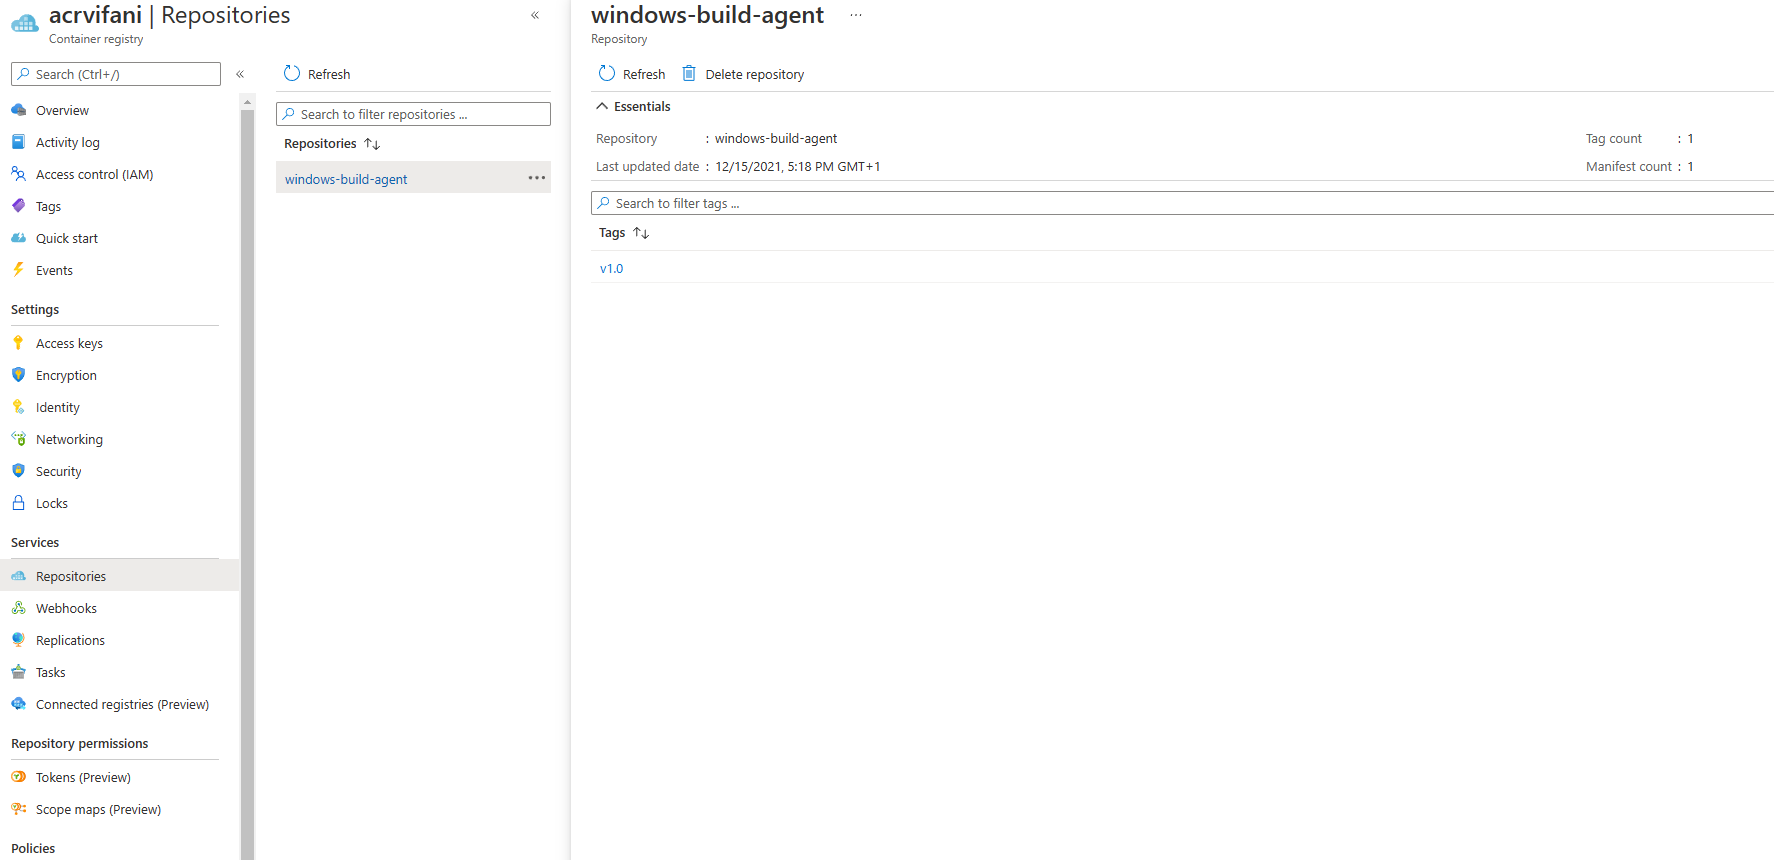
If the command has been correctly executed, you will see the image showing up in the Azure Container Image repositories
Run a Docker Image on Azure Web App for Containers
Now is time to run the container image on an Azure Web App for Containers instance. Considering that in the previous chapter we have already set up an Azure Container Registry, the steps to prepare the remaining resources are the following:
|
|
Because we are running an Azure DevOps Agent on Windows, we have to use at least the P1V3 SKU, the minimal supporting Hyper-V (you can see the –hyper-v flag in the CLI command).
The last step is about configuring our DevOps Agent. We need to put into the App Service Settings the same parameters we have used to run the Docker Image locally on Windows:
- AZP_URL: for example “https://dev.azure.com/yourorganization"
- AZP_TOKEN: a valid Personal Access Token (more details here)
- AZP_POOL: the Azure DevOps Agent Pool name
- AZP_AGENT_NAME: the agent name
We can use the following command to define the settings:
|
|
By default, all Windows Containers deployed in Azure App Service are limited to 1 GB RAM. If you need more memory, you can change this value by providing the WEBSITE_MEMORY_LIMIT_MB app setting
|
|
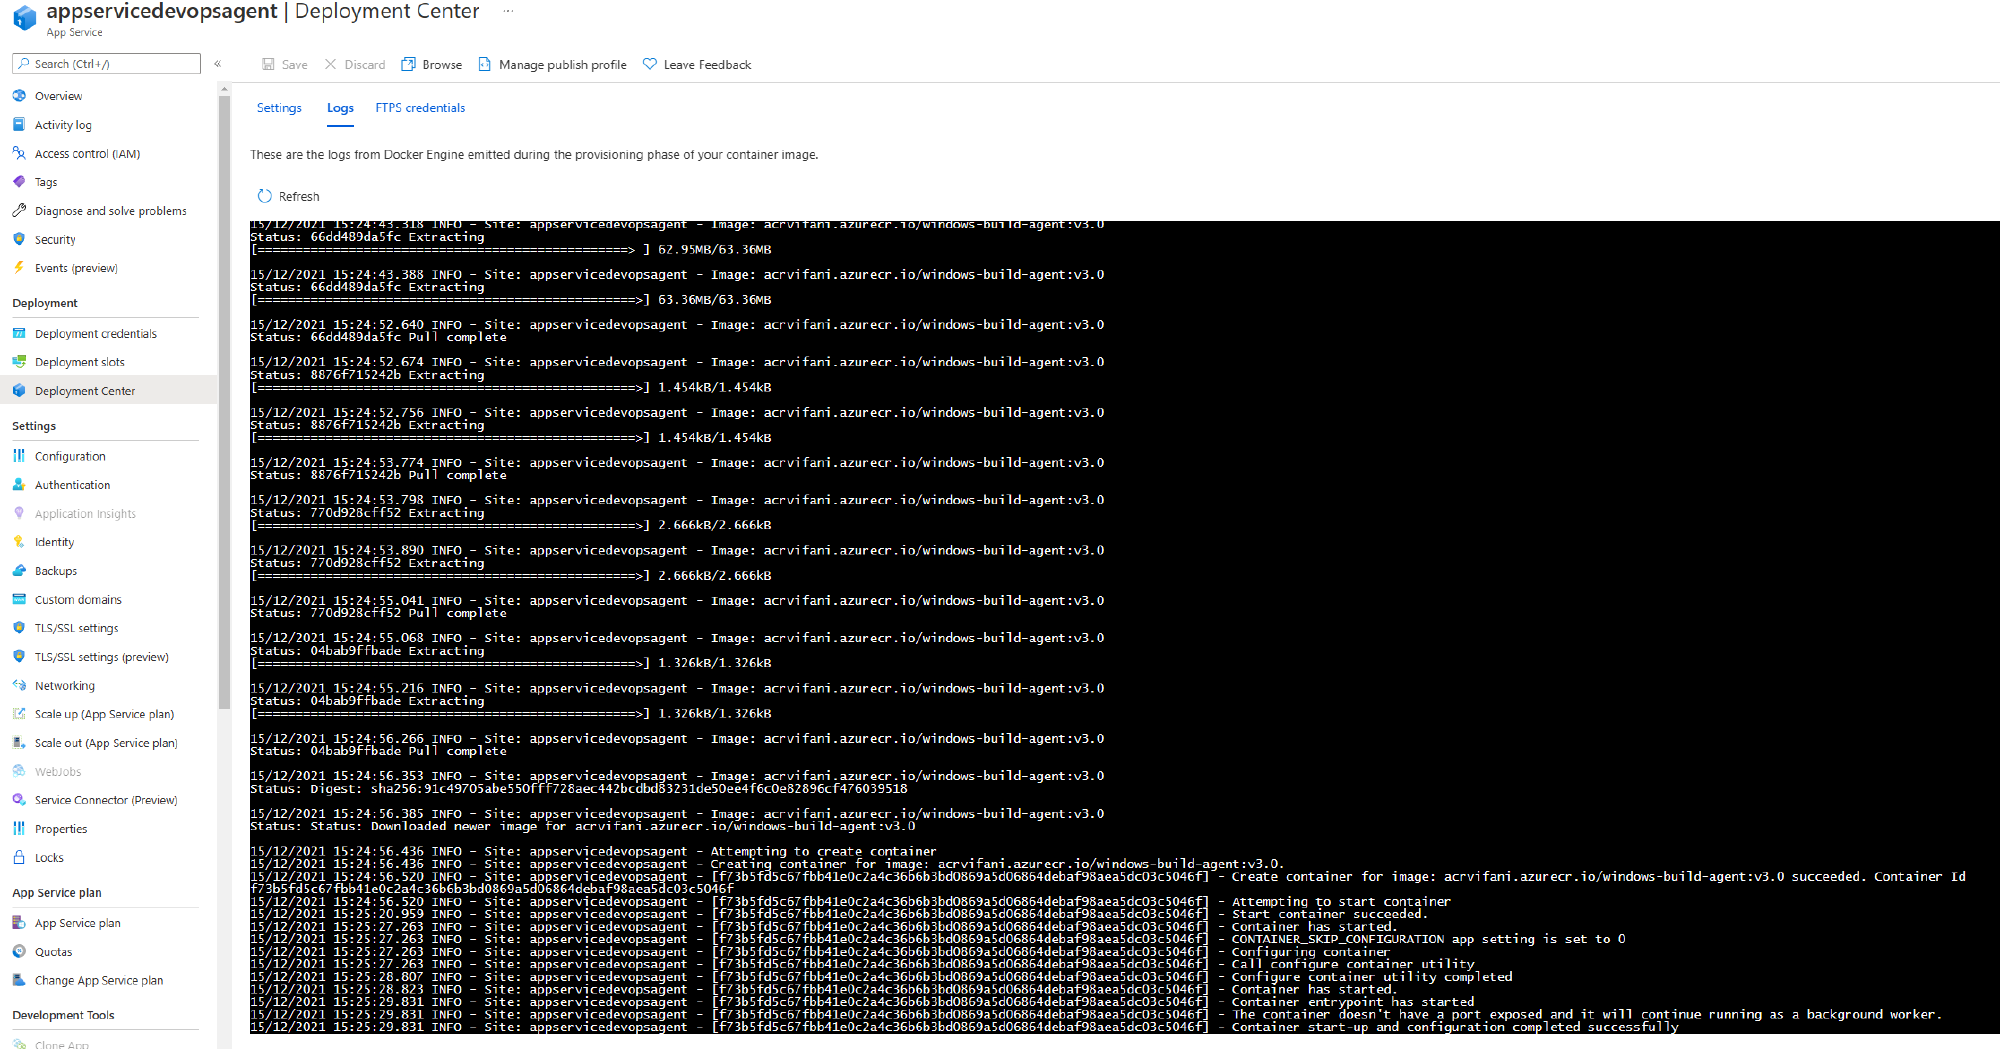
If everything goes well, in the Deployment Center panel of the new Web App For Containers instance you will see “Container start-up and configuration completed successfully” sentence.